Saturday, May 14, 2011

Sunshine and Mason Jar pies

 
I have been given the great opportunity to organize monthly activities for the ladies at church. We have a different theme every month and May was "Sunshine in Your Soul." We decided to do a dinner outside in a lovely backyard (not mine) where people could sit, relax and get to know one another. I love these nights because I can actually have a full conversation without anyone interrupting, pulling on my leg or yelling "I have to go pee!" Anyway, I digress. So it was a cool, spring evening with yummy food and great conversation and I thought I would share some of the highlights!

I am so in love with these striped paper straws. I got mine here. So stinking cute! And the paper doesn't come apart when you drink out of them! We had lemonade in mason jars but I apparently was too busy conversating to take a picture of those.
 I created conversation cards - taken from the great game Table Topics- for the ladies to ask each other. Some of the questions included "what historical time period would you like to visit?" "what was your favorite childhood meal" and my personal favorite "what was the most ridiculous but very cool fashion trend you followed?"

The favors were yellow tulip cakes (thanks Little Debbie!) tied with tags that said "spread sunshine."
 The highlight of the night for me was sharing these adorable pies in mason jars. Every woman had one at her place setting - either apple pie or mixed berry. I saw the idea here on Paiges of Style and knew I had to do it! Paige shared a mixed berry recipe so I will share how I made the apple pies.
Makes 8 pies
8 Granny Smith apples, peeled and sliced (about 1 1/2 pounds)
2 Tbsp. lemon juice
1/2 c. sugar
1/2 c. brown sugar
2 Tbsp. all-purpose flour
1/2 tsp. ground cinnamon
1/4 tsp. ground nutmeg
2 Tbsp. butter, chopped
2 pie crusts (store bought or your own)
Half pint wide mouth jars found here

Peel and chop your apples very small. They will not cook well if they are too large. Put them in a bowl and pour the lemon juice on them.
 Mix the sugars, nutmeg, cinnamon and flour in a separate bowl.
 Pour the dry ingredient mixture on the apples and mix well.
 Fill the mason jars with the apples. Go all the way to the top - the apples will settle as they cook. Place a couple of tabs of butter on top of the apples.
 Roll out your pie crusts and use the rim of lid cut out the crusts. Place each crust on top of the apples and push into the sides with a fork. Pierce the top of the crusts with a knife to allow for ventilation. Sprinkle some sugar on top if you like!
 Place the jars on a baking sheet and bake at 350 for 45 minutes, rotating once. LOVE how wonderful your house smells and just try to keep your husband from stealing one :)
Apple
 Mixed berry
Let the pies cool completely. Then you can make them even cuter with fabric squares under the rims or you could tie ribbon and attach a tag. These were a big hit with the ladies and would make great gifts for teachers, new neighbors or around the holidays. Don't forget the ice cream!

Monday, May 9, 2011

Chicken Spinach Lasagna

Do you need a new recipe to add to your weekday repetoire? Do you have a gazillion friends having babies and want to bring them a good meal? My college friend Amy, shared this great recipe for Chicken Spinach Lasagna. Some of the ingredients don't seem like they should go together i.e the soy sauce and nutmeg but it is DELISH! I promise your family or whoever you make it for will ask for more!
Chicken spinach lasagna
8-10 lasagna noodles (DO NOT use the no bake)
10 oz. frozen chopped spinach, thawed, and drained completely (I usually wrap it up in a dish towel and ring it out)
2 cups chopped cooked chicken
2 cups shredded cheddar cheese
1/3 cup finely chopped onion
1/4 tsp. nutmeg
1 Tblsp. soy sauce
1 can cream of mushroom soup
8 oz. sour cream
4 1/2 ounce jar sliced mushrooms, drained
1/3 cup mayonnaise
4 oz. grated Parmesan cheese
Cook lasagna noodles.  Combine spinach, chicken and all other ingredients except Parmesan cheese.  Grease 9X12 casserole.  Layer noodles and chicken mixture, making 3 layers.  Sprinkle with Parmesan cheese. Bake covered in 350 degree oven for 50 minutes, uncovered 10 minutes.
Start by boiling your noodles. Yes, you have to boil the noodles. You cannot use the no-bake noodles because the lasagna does not have enough "juice" to cook the noodles.
Then on to wringing out the spinach. I really don't like this part. I defrost it in the microwave and then wrap it in a towel and wring it out. If you have a better way, please let me know.
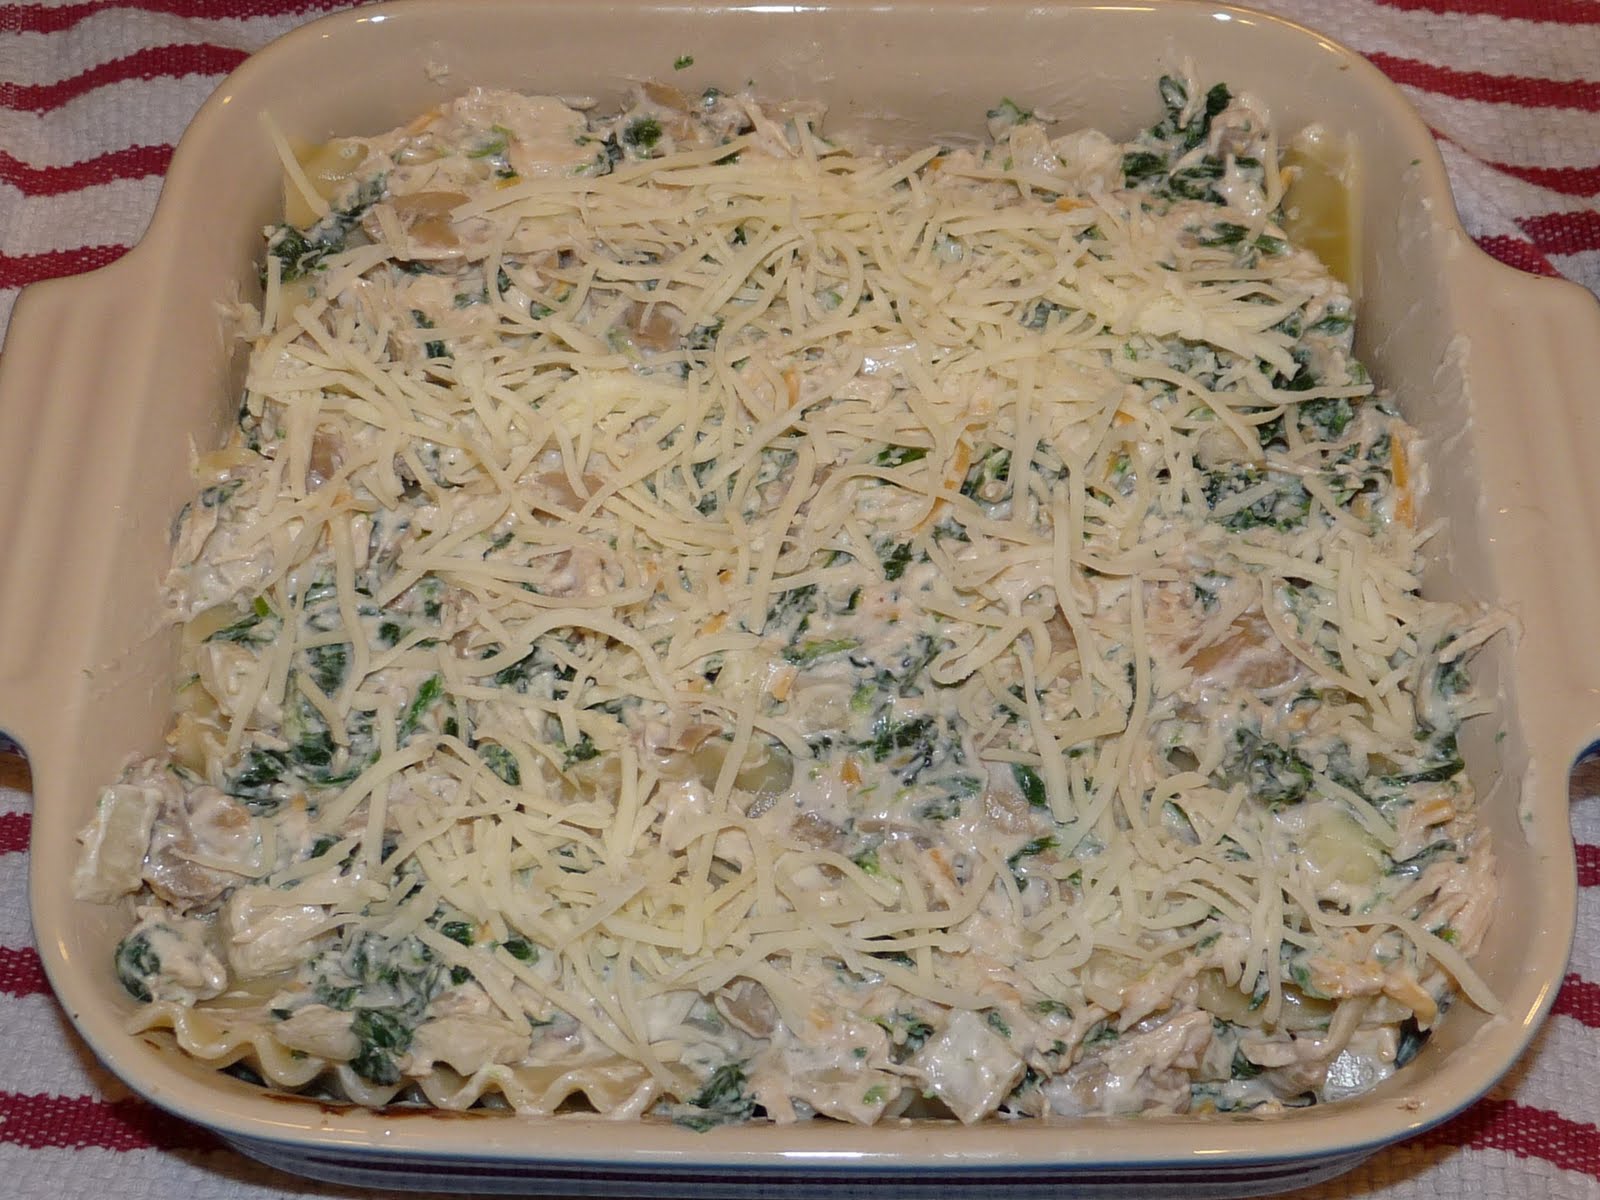
 Combine the spinach, chicken, cheese, onion, nutmeg, soy sauce, mayo, mushroom soup, sour cream and mushrooms together. It will look delectable, like this:
 Spread a layer of the chicken spinach mixture in the baking dish.
 Layer the cooked noodles on top. Repeat these steps until you run out.
 Finish with the chicken mixture on top. Sprinkle on the parmesan. I didn't have any parmesan so I used mozzerella- just as yummy! Bake it covered at 350 for 50 minutes and then uncovered for another 10 minutes.
 I made two- one for us and one for a new mom. My advice is to always bring food in a disposable container because although the new mom is so thankful for the meal, it is a big ole pain in the butt to track you down to return your pyrex!
Enjoy!

Wednesday, April 27, 2011

Two great sites you MUST know about!

Have you heard about these two great sites? Do you like a deal? Check them out!

Very Jane promotes handmade and boutique items at discounted prices. And this week they are offering all of their deals for FREE! Sign up for their email list and you'll get the deal of the day sent right to you. Very cute stuff at very affordable prices!

And the other one I am loving is Pick Your Plum. They offer the most "swank" crafting supplies that they find and slap primo (aka ridiculously low) pricing on them. There are limited supplies so you have to get there fast. They post every day at 8am EST. Sign up for their email alerts and you'll be the first to know!

Happy Shopping!

Monday, April 25, 2011

Royal Wedding Party Ideas


Ah the Wedding Week is here! All the pomp and circumstance is getting me excited- even Disney Junior (the drug of choice at our house) is having a "Royal Wedding Week."  Are you having a viewing party? I am attending one at my friend's home aka Edgarham Palace but don't think we lovelies are waking up at 5am. No, thanks to DVR those of us with kids and jobs can actually watch the festivities a little later in the day (or night) and enjoy every gory detail! How did our moms do it back in 1981 for Charles and Diana?
 Are you looking for ideas for your party? Decorations? Food? Dust off your tiara and try some of these!

The "Keep Calm" print above can be found here for FREE download from The TomKat Studio. Included in the printable collection are these adorable cupcake toppers or use them as tags and tie them on the tiaras you will give your guests as they arrive!

More free printables can be found here from the Design Editor. She includes an invitation, pennants, drink wraps and crowns!


Hostess with the Mostess designed a beautiful party collection in yellows and blues that could be used for the Royal Wedding party. All the printables are FREE on her site. The colors are stunning!


 How cute is this drink stirrer idea? Glue plastic princess rings (found at any party store) to lollipop sticks. Genius!

Lettering Delights has some great fonts and graphics on their site and some of them are even free including royal cupcake wrappers.

What will be on your menu? How about coronation chicken salad originally created for the queen's coronation?

 This fruit pizza would be a show stopper!
Or this "royal" blue velvet cake:
These English Rose Jam cakes would be a pretty addition to any table setting.

Hope these ideas help you with your party or gave you inspiration to have one! Cheers to the happy couple!

Wednesday, April 20, 2011

Easter Centerpiece Idea and others

Whew! Y'all loved the S'meeps and the free printable! Over 1800 have been downloaded thus far- very exciting for my new little blog! Keep commenting, sharing and following! Sorry for the delay in a new post. We were hit with tornadoes here in Raleigh over the weekend and although we were fortunate enough to be okay, we have friends whose homes were destroyed. Please keep this area in your prayers!

Are you having an Easter brunch, hunt or get together and need a fun and cheap centerpiece? Check this out!
You will need:
-Mason jars (I got mine at Goodwill for 50 cents)
-Easter grass
-Peeps
-6" lollipop sticks
-ribbon
-Floral foam

 Cut a thin, tall piece of floral foam and wrap your grass around it. Stick the grass and foam down into the Mason jar, making sure the grass hides the foam.
Skewer your Peep with the lollipop stick. Poor Peep- first we make him a s'more and now he gets skewered!
Cut a piece of ribbon to fit around your jar, leaving a few inches to overlap. Place a dot of glue on the ribbon where it will overlap and wrap around the jar, gluing the ribbon together tightly. You could also put a dot of glue on the jar to stick the ribbon to it.
 Stick the peeps down into the floral foam and arrange to your liking! You could do this with all different color peeps, grass and ribbon. I will be making 10 and lining them long ways down the table. Fun, easy, cheap and edible!
If you are having an Easter get together, check out this adorable "Bunny Hop" over at Hostess with the Mostess. Great ideas on a budget! I love the brownies cut with a bunny cookie cutter and put on a stick for a centerpiece. Loving things on sticks these days!
And the "carrot patches" below are too cute! Just creme wafers, crumbs from the brownies and carrot lollipops from the dollar store!
I was in charge of my 2 yr old's Easter party at school and borrowed the bunny tail idea. The kids loved making the tails- what 2 yr old doesn't like glue? But even more so, they loved hopping around with their tails on! It was an easy craft and we got to sing "Here comes Peter Cottontail" many times as we hopped around the room.
A tail shot
Action shot- Hopping down the bunny trail!
Hope you have a wonderful Easter weekend! Come back next week as I will be dusting off my tiara to share some Royal Wedding Viewing Party ideas!

Tuesday, April 12, 2011

S'meeps

Want a fun treat to give to school friends, neighbors or the postman? Wrap up some S'meeps!

You will need
- Hershey bars
- graham crackers
-your favorite color Peeps!
-cellophane gift wrap
-ribbon
 Use cellophane gift wrap (I got my roll at the Dollar Store) and put some Easter grass in the bottom. Then stack the peeps on the bottow, the graham crackers in the middle and chocolate on top. Gather the cellophane and tie up with ribbon and a tag explaining the s'meeps. I know they are pretty self-explantory but it looks cute!

 Jack is very excited to bring these to his friends tomorrow.

Wait! You don't have a S'meeps tag? Let me help! I love when my favorite sites share their tags so I am sharing mine! Download your Easter S'meeps tag for free here and make your own! And if you have a four year old who insists on "boy" colors instead of Easter colors you can download the more masculine one here.
Leave a comment and let me know if you make your own Smeeps!

Oh and the cute subway art in the frame on my buffet is from the girls at eighteen25. You can download it for free too!

Saturday, April 9, 2011

Easter Egg Cake Pops

I love cake pops and I have made them a few times but it has been a while. I am in charge of the Easter party at preschool so I thought cake pops might go over well because what 2 yr old doesn't like cake and lollipops? And there is no icing mess to clean up!
 Cake Pops:
1 box of your favorite cake mix made to directions
1 tub of your favorite icing
Chocolate melts (I used Wilton)
Lollipop sticks
Sprinkles

 Bake the cake and let it cool COMPLETELY
Crumble the cake up and spoon half of the tub of icing. Mix it up. You want to be able to make balls out of the "dough" so add icing as necessary.
 Stop and check on your super cute baking assistant!
Roll the "dough" into egg shapes and put on a cookie sheet. I covered mine in wax paper so they wouldn't stick. Put the eggs in the freezer for 2-4 hours to chill.
Melt you chocolate in the microwave. I always start with 1 minute and then check and continue in 30 second intervals because chocolate can overcook quickly. Stir the chocolate each time you check them.
Take a lollipop stick, dip it in the melted chocolate and then into the egg. The chocolate will help the stick stay in place. Roll the egg in the melted chocolate and shake off the excess chocolate. Immediately sprinkle because the chocolate will harden quickly.
Finished product
I learned that the multi-colored sprinkles are too big and do not stick well so I will need to find some that are a little smaller. The colored sugar did great and looks very festive! I put some floral foam in this tin bucket I got in the dollar section at target and stuck the pops in the foam. Add some grass and you have a great centerpiece for a party, gift for a neighbor or a treat for your own family!